Your viewer picks the color format and the encodings it asks for, and the desktop the server created picks its own size and depth. That puts VNC picture quality settings in two layers, and soft text, banding or a desktop that doesn't fit the window each belong to one of them. One thing crosses both layers: a TigerVNC viewer resizes the remote desktop to its own window by default, so the geometry you're looking at isn't always the geometry the session started with.
Work out which layer owns your symptom before you change anything. A viewer option only changes what the viewer asks for, and a change in the wrong layer costs you a viewer relaunch or a whole session restart and leaves the symptom where it was.
How the viewer and the server settle color and encoding before the first frame
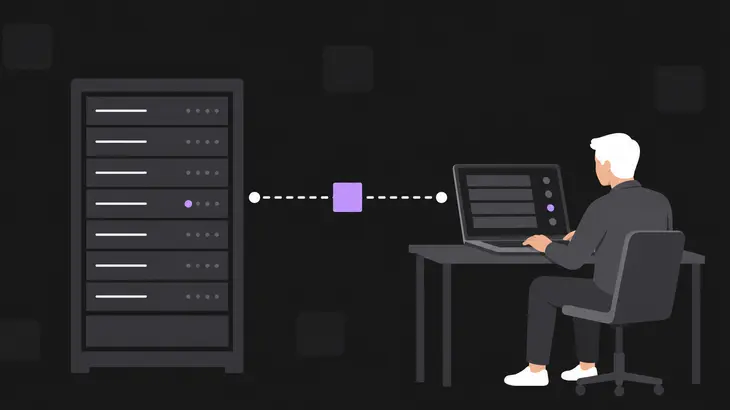
The server holds the desktop and your viewer draws it, so the two sides settle a color format for each pixel and a set of encodings for the changed areas before the first frame arrives. The viewer may set the format pixel values arrive in for framebuffer updates. When nobody asks, the server falls back to the natural format from its ServerInit message, and the color you get then comes from the server alone.
The viewer also lists the encodings it supports, best first. That order is a hint and nothing more, and raw pixel data can come back whatever the order asked for, so a compression choice you make in the viewer can leave the picture exactly as it was.
That splits the picture quality controls in two. The viewer owns the pixel format it requests, the encodings it lists, and the JPEG and compression levels it asks the server to apply. The server-created desktop owns its size and its color depth, and it keeps both until the session restarts. Size is the exception, because Xvnc accepts a resize request from a viewer by default and a TigerVNC viewer sends one every time its window changes. Once you know which layer holds the setting, you know whether you are relaunching the viewer, restarting the session, or stopping the viewer from moving the mode.
Soft text, banding or a wrong-sized desktop: read the mode the server reports
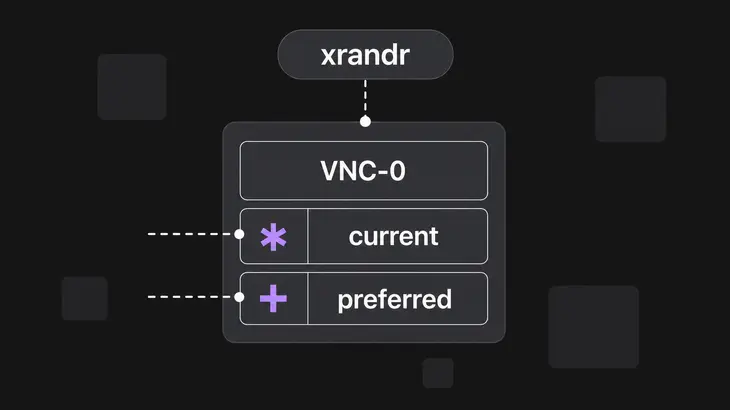
You get soft or pixelated text, visibly reduced color, or a desktop bigger or smaller than the viewer window. The cause is the color format and encoding in use, the desktop the server created, or the viewer having resized that desktop since. The surest way to tell which is to run xrandr inside the X session your viewer is showing.
Open a terminal in that session on the server host and run xrandr with no options, which dumps the state of every output along with its modes:
xrandrThree readings in that output tell you what to do next:
- A TigerVNC virtual session answers on a single output called
VNC-0, and its mode list holds the session's current size plus a fixed set of standard sizes that Xvnc offers regardless of the host's real hardware. That's why the list looks nothing like a physical monitor's. - The mode carrying a
*is the current one. Compare its width and height with your viewer window. - The mode carrying a
+is the preferred one, which in a virtual session tracks the size the desktop was last set to. A*and a+on different lines mean the mode moved after the session came up.
Three reads that show which VNC picture quality settings are in force
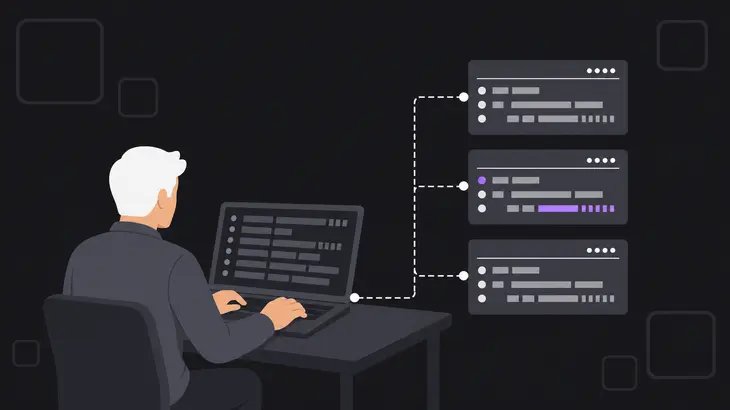
Start with the viewer's launch options, then the arguments the session's X server started with, then the running mode. None of the three changes anything, and the first costs least because you need no access to the server host for it.
-
Read the command line or saved connection profile your viewer was launched with. A TigerVNC viewer started without
-AutoSelect=0keeps choosing encoding, JPEG quality and color level for itself, so a value set by hand there never held. A TightVNC viewer carrying-quality,-nojpegor-compresslevelhas JPEG and compression pinned by hand instead. The two take different flag names, and on Debian and Ubuntuvncvieweris an alternatives link that either package can own, so settle which binary you are running before you trust either flag set:update-alternatives --display vncviewer -
Read the arguments the session's X server started with.
-Cselects on the executable name rather than the command line, and the TigerVNC X server installs asXtigervncon Debian and Ubuntu and asXvncon Fedora and RHEL, so name both:ps -C Xvnc,Xtigervnc -o pid,argsA
-depth 16in that line is your banding: depth 16 brings the RGB565 pixel format where 24 and 32 bring RGB888. No-geometrymeans a default, and which default depends on what started the session: the X server binary on its own creates 1024×768, while thetigervncserverwrapper creates 1920×1200. Depth defaults to 24 either way. -
Compare the mode carrying the
*with the geometry from the second read. They match on a session nobody has resized, and that puts a soft or washed-out picture on the viewer's own format and compression. They differ once something has resized the desktop, and in a TigerVNC session that something is nearly always the viewer, because dynamic resizing is on by default and the desktop follows the window. Relaunch with-RemoteResize=0and the mode stays where you put it.
Force the format and compression on a TigerVNC viewer
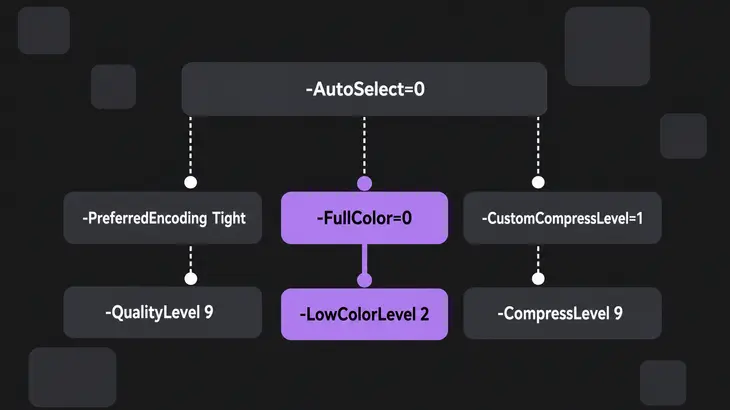
TigerVNC Viewer measures the connection and keeps re-picking encoding, JPEG quality and color level while you work, so your manual values only hold once automatic selection is off. Turn it off and set the values in the same command. Every one of them is a viewer option, so none of this needs a shell on the server host:
xtigervncviewer -AutoSelect=0 -PreferredEncoding Tight -QualityLevel 9 <server-host>:1With automatic selection off the viewer starts from Tight encoding, quality level 8 and full color. Quality runs 0 to 9 and only drives JPEG inside Tight, so -NoJPEG overrides whatever number you pass with it.
Reduced color needs -FullColor=0 in front of the level, because full color is the default and the level on its own changes nothing:
xtigervncviewer -AutoSelect=0 -FullColor=0 -LowColorLevel 2 <server-host>:1Level 0 is 8 colors, 1 is 64 and 2 is 256.
The lossless compression level has a second switch in front of it. -CompressLevel on its own is ignored, because the viewer applies it only while CustomCompressLevel is on, and that one defaults off:
xtigervncviewer -AutoSelect=0 -CustomCompressLevel=1 -CompressLevel 9 <server-host>:1The viewer prints what it settled on to stderr at its default log level. A line beginning Using pixel format names the format in force. A line like Throughput 1500 kbit/s - changing to quality 6 or Throughput 180 kbit/s - full color is now disabled means automatic selection is still running and still overruling you, so -AutoSelect=0 never reached that launch.
RealVNC Viewer puts the same three controls behind one dropdown. Picture quality in a connection's Properties is the Quality parameter, which ships as AUTO. HIGH and LOW pin quality whatever the network does, and only CUSTOM lets ColorLevel and PreferredEncoding through, since both are ignored at any other Quality. ColorLevel runs rgb111 for 8 colors, rgb222 for 64, pal8 for 256 and full for full color, and it starts at pal8.
Pin JPEG quality and compression on a TightVNC viewer
The packaged Unix TightVNC viewer is the 1.3 series, and it has no automatic mode to fight: you pass its JPEG and compression controls as command-line options when you start the viewer. -quality sets JPEG quality for Tight encoding, -nojpeg turns lossy JPEG off and -compresslevel sets how hard the server works to compress Tight and Zlib. Both levels run 0 to 9.
-
Set the JPEG quality level for Tight encoding. Level 0 trades picture quality for a striking compression ratio and level 9 does the reverse, and the Tight encoder only reaches for JPEG on the areas that suit lossy compression, so 0 is less destructive than it sounds:
xtightvncviewer -quality 9 <server-host>:1 -
Turn lossy JPEG off when the picture has to be exact. It isn't a free win: without JPEG the Tight encoder is less efficient, so color-rich areas cost you more bandwidth than they did:
xtightvncviewer -nojpeg <server-host>:1 -
Set the Tight and Zlib compression level. Level 1 spends the least server CPU and compresses weakly, 9 compresses best and is slow on the server, and 0 isn't worth reaching for. Go high on a very slow link and low on a LAN, and if updates lag at 9 the server is your bottleneck, so come back down:
xtightvncviewer -compresslevel 9 <server-host>:1
Restart the session when the depth or the startup geometry is wrong
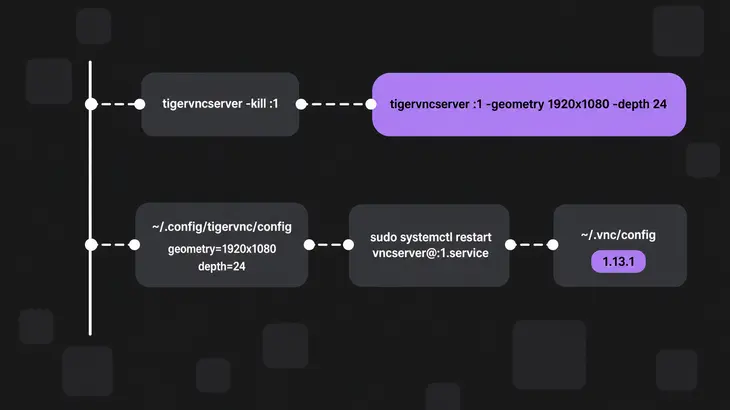
-depth, -geometry and -pixelformat are command-line options on the X server rather than runtime parameters, so a wrong depth means a new session and not a new setting. On Debian and Ubuntu, kill the display and start it again through the same wrapper, carrying the geometry you want:
tigervncserver -kill :1
tigervncserver :1 -geometry 1920x1080 -depth 24
Read the arguments back and check the port, which is 5900 plus the display number:
ps -C Xvnc,Xtigervnc -o pid,args
ss -ltn | grep 5901
Old -depth or -geometry values in that output mean the first session never died and you reconnected to it.
On Fedora and RHEL the session runs under systemd and the wrapper takes nothing but a display number, so the options live in a config file. Put geometry=1920x1080 and depth=24 in ~/.config/tigervnc/config on Fedora, then restart the unit with sudo systemctl restart vncserver@:1.service. RHEL 9 still ships TigerVNC 1.13.1, which looks in ~/.vnc/config instead: the XDG path only arrived in 1.14.0, so a file at the newer path is read by nothing there and the geometry comes back unchanged.
Resize the desktop with xrandr: pick a mode the output already lists
Inside the session, --output names the output and --mode takes a mode that output already lists. It won't invent a size, so take both names straight from the xrandr listing.
-
Select a listed mode on the session's output:
xrandr --output VNC-0 --mode 1680x1050 -
For a size the output does not list, have the viewer ask for it on connect. Xvnc creates the mode to satisfy the request, and it then appears in the listing like any other:
xtigervncviewer -DesktopSize 1600x900 <server-host>:1 -
Print the current mode and confirm the switch:
xrandr | grep '*'A different mode on that line means the viewer resized the desktop again, so size the viewer window first or reconnect with
-RemoteResize=0.
RealVNC's equivalent is off at both ends and has to be turned on at both: DynamicResolution set to TRUE on a Viewer from 7.6.0, against a Virtual Mode server with AllowDynamicResolution set to TRUE.
The decision is only ever which side to touch: a viewer relaunch for format, quality and compression, a new session for depth and startup geometry. If the size is what's wrong, settle RemoteResize before either one, or the viewer keeps moving the mode under you and your next change looks like it failed.
Once you know the numbers you want, pass them at startup rather than chasing the same VNC picture quality settings on every connection: geometry and depth on the tigervncserver line, or in the wrapper's config file where a systemd unit starts the session: ~/.config/tigervnc/config on Fedora, ~/.vnc/config on RHEL 9, ~/.vnc/tigervnc.conf on Debian and Ubuntu. What the viewer asks for is then the only thing left to tune.
FAQs
Does JPEG compression hurt remote text rendering?
At low Tight-encoding JPEG quality it does, because JPEG is lossy and text is the high-contrast content it handles worst. Quality level 0 in the TightVNC viewer trades picture quality for a striking compression ratio while level 9 keeps the quality at a lower ratio, and -nojpeg drops the lossy step when the picture has to be exact. A TigerVNC viewer runs quality 8 and falls to 6 on its own below roughly 16 Mbit/s, so text that softens partway through a session is automatic selection reacting to your link rather than anything you touched.
Why does the remote desktop resize when I resize the viewer window?
Because both ends allow it out of the box. Xvnc accepts a desktop resize request by default, and a TigerVNC viewer sends one whenever its window changes, so the session geometry follows your window and any mode you set with xrandr gets overwritten. Shut it off on whichever end you control: -RemoteResize=0 on the viewer, or -AcceptSetDesktopSize=0 on the server.
Discuss this in the community
Questions about this, or a setup it does not cover? Ask in Using VNC Technology.