LibVNCServer is what you link when your own program has to be the VNC server. You hand it a framebuffer, call rfbInitServer(), and any standard VNC viewer can connect and watch; the example server listens on port 5900. Its sibling, LibVNCClient, does the same job for the viewer side.
Two things to know before you write a line of code. The 2026 security fixes are in Debian's libvncserver packages and on upstream master, but in no tagged release, so don't build the 0.9.15 tag from December 22, 2024. And a server built from the examples listens on every interface with no password until you tell it otherwise.
Two libraries, one RFB session
Both libraries come out of one CMake tree. The server library makes your program the VNC server: its API creates the server instance, wires up the input handlers and manages cursors. LibVNCClient makes your program the viewer, and the repository has working examples of each in examples/server and examples/client.
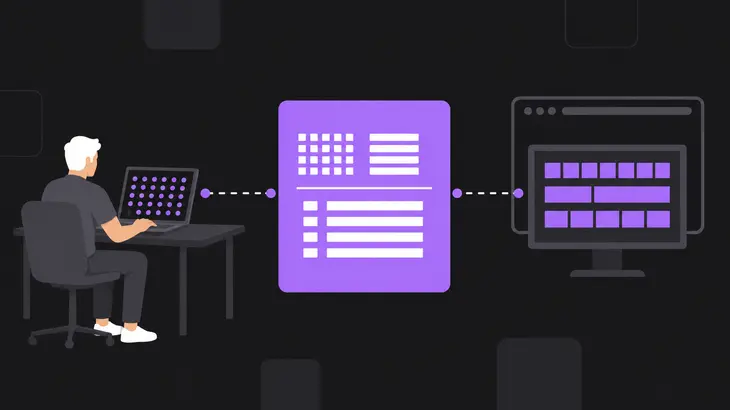
A session is plain RFB. The viewer asks for framebuffer updates and your program answers with the regions that changed. The server side speaks Raw, Tight, Zlib and ZRLE among other encodings, plus WebSockets and encrypted WebSockets, so noVNC in a browser can connect to it directly.
Install the package, or build master
Take the distribution package unless you need something only master has. It installs both libraries with their headers, pkg-config files and CMake package files:
sudo apt install libvncserver-devIt's also the patched build, at least on Debian, which backported the 2026 security fixes into it while no tagged upstream release has them yet.
Build master when you need upstream's latest or a different crypto backend, which you choose at configure time (see the build switches below). Install a compiler, CMake and the optional crypto and compression libraries, then do an out-of-source build and install it:
sudo apt install git build-essential cmake libssl-dev zlib1g-dev libjpeg-dev libpng-dev
git clone https://github.com/LibVNC/libvncserver.git
cd libvncserver
mkdir build
cd build
cmake ..
cmake --build .
sudo cmake --install .
sudo ldconfig
cmake --install puts the libraries, pkg-config files and CMake package files under the default prefix, /usr/local. Don't skip ldconfig. Without it your first program dies at start with libvncserver.so.1: cannot open shared object file, because the linker cache doesn't know the new library yet. Off Debian, CMake is in yum, Homebrew, MacPorts and Chocolatey.
A first server you can connect to
It takes four calls. rfbGetScreen() creates the screen; bytes per pixel can be 1, 2 or 4:
rfbScreenInfoPtr screen = rfbGetScreen(&argc,argv,screenwidth,screenheight,8,3,bpp);Give it a framebuffer. Every connected viewer sees this buffer:
screen->frameBuffer = (char*)malloc(screenwidth*screenheight*bpp);Start the listener and the event loop that serves the viewers:
rfbInitServer(screen); rfbRunEventLoop(screen,-1,FALSE);Whenever your program draws, mark the changed rectangle so the server sends it out:
rfbMarkRectAsModified(screen,x1,y1,x2,y2);For input, set the kbdAddEvent() and ptrAddEvent() handlers before rfbInitServer(). If you write your own pointer handler, call rfbDefaultPtrAddEvent() inside it so the cursor coordinates still get handled.
Upstream's simple.c is exactly those calls at 400×300 and 4 bytes per pixel, 3 of them colour, with a blocking event loop. It checks only that rfbGetScreen() returned a screen and never draws, so the viewer shows whatever bytes the buffer happens to hold. That's expected, not a broken build. Compile it against the installed library:
gcc simple.c -o simple $(pkg-config --cflags --libs libvncserver)Here's the part that bites. Out of the box it listens on port 5900 on every IPv4 and IPv6 interface, with no password. rfbGetScreen() passes argv to the library's option parser, so bind both listeners to loopback when you start it:
./simple -listen localhost -listenv6 ::1It logs Listening for VNC connections on TCP port 5900 and the matching TCP6 line. From a second shell on the server, check where it bound:
ss -tln | grep 5900You want 127.0.0.1:5900 and [::1]:5900, and nothing on 0.0.0.0 or [::]. From your workstation, forward local port 5900 over SSH and leave that session open:
ssh -L 5900:localhost:5900 <user>@<server-host>Then, from a second terminal, point a viewer at display 0, which is port 5900:
vncviewer localhost:0On a trusted network you can skip the tunnel: drop the -listen options, add -rfbauth <passwd-file> (the storepasswd example writes that file) and connect with vncviewer <server-host>:0.
Ctrl+C stops simple. A program that runs its own loop stops the server with rfbShutdownServer(screen, TRUE), which disconnects the viewers, and then frees it with rfbScreenCleanup(screen).
Link your own program against it
The package or an installed build gives you CMake targets and pkg-config entries, so you never add include or library paths by hand. CMake package files ship with versions newer than 0.9.13: find_package finds the library and target_link_libraries attaches its exported target to yours. Put both lines in your CMakeLists.txt, with your own target in place of <project-target>:
find_package(LibVNCServer)
target_link_libraries(<project-target> LibVNCServer::vncserver)
Viewer code links LibVNCServer::vncclient the same way. Without CMake, pkg-config has entries for both libraries, libvncserver and libvncclient, which is what the gcc line for simple.c used:
pkg-config --cflags --libs libvncclientBuild switches: the crypto backend and the HTTP directory
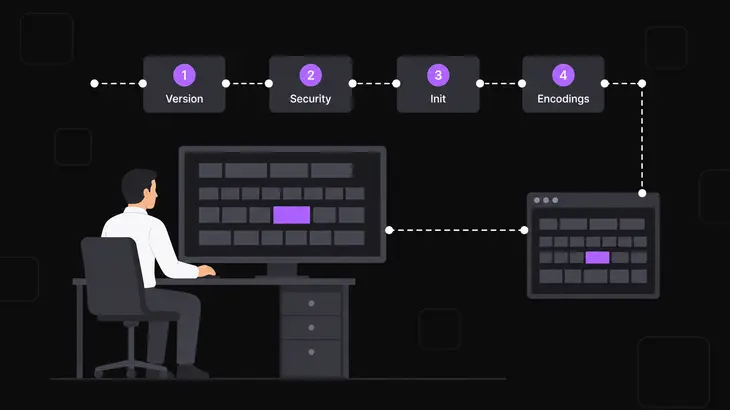
The crypto backend is the switch that matters, because it decides which authentication methods LibVNCClient can offer. You pick it at CMake time, one per build:
cmake .. -DWITH_OPENSSL=ON -DWITH_GCRYPT=OFF
cmake .. -DWITH_OPENSSL=OFF -DWITH_GCRYPT=ON
cmake .. -DWITH_OPENSSL=OFF -DWITH_GCRYPT=OFF
OpenSSL or Libgcrypt (the first two lines) gives LibVNCClient every authentication method in its list. The server library offers None and VNC authentication whichever backend you pick, so the choice only widens the viewer side. The included backend, with both flags off, limits both libraries to VNC authentication. All three keep WebSocket support in the server library. CMake prints its pick, such as Building crypto with OpenSSL, and prefers Libgcrypt when both libraries are found. TLS is a separate switch, covered under encryption below.
At runtime, the field to know is rfbScreenInfo::httpDir. Point it at a directory holding vncviewer.jar and index.vnc and the server also starts an HTTP server, on 5800 plus the display number. For testing the WebSocket side, git submodule update --init in the checkout pulls in the noVNC viewer.
Encryption: a tunnel, or TLS on the WebSocket side
Plain RFB gives you an optional password check that is cryptographically weak, and nothing against anyone watching or tampering with the traffic. You get encryption only when both ends agree on an extended security type during the handshake. The server library lists just None and VNC Authentication, so its one TLS route is secure WebSockets. Native viewers go through an SSH or IPsec tunnel instead, like the loopback bind and ssh -L above.
LibVNCClient is the richer side. On top of None and VNC Authentication it lists SASL, MSLogon, Apple ARD, UltraVNC MSLogonII, TLS and VeNCrypt. TLS is the second switch in the same build, independent of the crypto backend: both libraries take OpenSSL or GnuTLS as the TLS library. In the server library that TLS code carries the secure WebSockets. CMake prefers GnuTLS when both are installed and prints Building TLS with GnuTLS:
cmake .. -DWITH_OPENSSL=ON -DWITH_GNUTLS=OFF
cmake .. -DWITH_OPENSSL=OFF -DWITH_GNUTLS=ON
Secure WebSockets need a host certificate and key, and minica is the quick way to make them:
-
Install minica, with apt on Debian-based systems or Homebrew on macOS:
sudo apt install minica brew install minica -
In your source checkout, fetch the noVNC viewer and generate the host's key and certificate in
webclients. minica writes them to a directory named after the host, and its CA certificate tominica.pem:git submodule update --init cd webclients minica --domains $(hostname) -
Start the example server from
webclientswith that key and certificate. Run it from anywhere else and it can't find its HTTP index file. It listens on its default 5900 (display 0) and prints the URL to open in the browser:../build/examples/server/example -sslkeyfile $(hostname)/key.pem -sslcertfile $(hostname)/cert.pem -
Import
minica.peminto the browser's trusted authorities, open the printed URL and use the noVNC encrypted-connection button.
Slow or laggy links
Work out which one you have first, because the fixes differ. For low throughput it's the encoding, the pixel format and scaling:
| Symptom | Setting | Effect |
|---|---|---|
| Low throughput | Request a lossy encoding such as Tight | Lowers bandwidth use |
| Low throughput | Use 16-bit high color instead of 24-bit true color, or a paletted mode | Lowers bandwidth with a smaller pixel format |
| Low throughput | Scale the framebuffer in the application | Reduces bandwidth for all clients |
| Low throughput | Per-client scaling with SetScale or SetScaleFactor messages | Reduces bandwidth for that client only; the viewer must support the messages |
High latency needs a different fix. RFB is client-pull by default, so the viewer asks for every update, and on a long link the fix is a viewer that keeps requesting updates continuously. Your server code stays as it is.
Link it, or run x11vnc or TigerVNC?
If all you need is a working VNC server, don't write C: run x11vnc or TigerVNC. Link the library only when the server has to live inside your own program, the way VirtualBox's built-in VNC server, GNOME Remote Desktop, Veyon and LCD4Linux do, with Remmina and MultiVNC on the LibVNCClient side (the project keeps a list of users). x11vnc is the close relative, split out of the LibVNC repository.
| Peer | What it is | Licence | Latest release shown | Maintenance and lineage |
|---|---|---|---|---|
| x11vnc | VNC server for real X displays | GPL-2.0 | 0.9.17 (May 1, 2025) | Unmaintained; the repository seeks a new maintainer |
| TigerVNC | High-speed, multi-platform VNC client and server | GPL-2.0 | v1.16.2 (March 26, 2026) | Split from TightVNC in early 2009 |
To try x11vnc on a physical display, store a password and serve :0. It needs an X11 session there, so a Wayland login gives it no display to share:
x11vnc -storepasswd
x11vnc -display :0 -localhost -rfbauth ~/.vnc/passwd
-storepasswd asks for the password and writes ~/.vnc/passwd, which -rfbauth reads. -localhost implies -listen localhost, so you reach it through the same SSH tunnel as the first server.
Security fixes, maintenance and the GPL
Upstream puts security fixes on master and doesn't cut point releases for released versions; downstream packagers cherry-pick them. That's why the package advice up top matters. Four security advisories from March 24 to May 29, 2026, the newest GHSA-v9pm-47h4-jcq8 / CVE-2026-50538, have fixes on master and none in a tagged release. Three hit LibVNCClient's decoding of Tight and UltraZip rectangles, and one the httpd proxy handlers in the server library. Debian patched all four into trixie's 0.9.15+dfsg-1+deb13u2 and bookworm's 0.9.14+dfsg-1+deb12u2, while a build of the 0.9.15 tag has none of them.
The libraries are GPL version 2 or later. Linking your program against either one makes it a derivative work under GPLv2, even if you never touch the library source. A program you use only inside your organisation doesn't have to publish its source; distribute one that links the libraries and the GPL obligations come with it.
Your next move is simple.c with your own pixels in it. Point frameBuffer at what your program draws, call rfbMarkRectAsModified() whenever it changes, and keep the listener on loopback until you've decided how viewers get in.
FAQs
Can one process host several LibVNCServer servers?
Yes. Each rfbGetScreen() call returns a separate screen with its own framebuffer, handlers and listener, and the struct's screenData pointer holds per-screen state when several screens share the same callbacks. The catch is the port: every new screen starts at 5900, so the second rfbInitServer() logs ListenOnTCPPort: Address already in use and serves nobody. Set screen->port and screen->ipv6port to a different value on each screen before rfbInitServer(), or set screen->autoPort = TRUE and the library takes the first free port from 5900 to 5999. Start each one with rfbRunEventLoop(screen, -1, TRUE) to put its loop on its own thread. Callbacks for different screens then run at the same time, so lock anything they share.
Why does compiling example.c fail with radon.h: No such file or directory?
example.c includes radon.h, the font it draws text with, and that header sits next to it in examples/server in the repository. The development package ships neither file. Put both in one directory and compile with the pkg-config flags:
gcc example.c -o example $(pkg-config --cflags --libs libvncserver)How do you cross-build it for Windows with MinGW-w64?
Upstream tests this route with MinGW-w64 on Debian. It still runs through CMake, with the supplied toolchain file pointing it at the Windows compiler, and every dependency has to be a Windows build.
-
Install the toolchain on the Debian build host:
sudo apt install mingw-w64 -
Build or fetch the Windows versions of optional dependencies such as libjpeg and put them in the
depsdirectory, where the toolchain file looks for them. -
For any other dependency, use its Windows development package. Your host's Linux -dev packages can't satisfy a Windows build.
Then configure and build from the build directory:
cmake -DCMAKE_TOOLCHAIN_FILE=../cmake/Toolchain-cross-mingw32-linux.cmake ..
cmake --build .
Are cross-built Windows example programs runnable without extra DLLs?
No. They need libwinpthread-1.dll in the build directory before they'll run, so copy it there once the MinGW-w64 build finishes.