Install Remmina together with its VNC plugin, make a profile with Remmina VNC Plugin as the protocol and <server-host>:1 in Server, and press Save and Connect. If the server only listens on localhost, which is TigerVNC's default on Debian and Ubuntu, switch on the profile's SSH tunnel and Remmina carries the session over port 22 instead.
The examples use a session on display :1, which listens on TCP 5901. Change the display number to match your server; the host, user and subnet are your own.
How Remmina reaches a VNC server
Remmina handles each protocol through a plugin, VNC and SSH among them, and the VNC one ships as a separate package, remmina-plugin-vnc. Without it, Remmina VNC Plugin never shows up in the protocol list.
The plugin connects to port 5900 plus the display number. Type a number under 100 after the colon in Server and Remmina reads it as a display, so <server-host>:1 and <server-host>:5901 both reach 5901. Leave the number off and you get 5900, which is display :0, not the :1 session in these examples.
Whether you can reach that port is the server's call. On Debian and Ubuntu, tigervncserver listens only on localhost unless you start it with -localhost no or with TLS or X509 security types and no *None type. Upstream's service, the one RHEL and Fedora run, listens on every address unless localhost is set in its config. That leaves you two routes:
- Direct: the server listens on its network address and the firewall lets your client in.
- SSH tunnel: the server stays on localhost; Remmina logs in over SSH and forwards the session to 127.0.0.1:5901 on the server.
Take the tunnel unless both machines sit on a network you trust. It works with the server's default, needs no extra firewall rule and keeps the VNC traffic inside SSH. To see which route your server allows, run this on the server:
ss -tln | grep 5901If the listening socket shows 127.0.0.1:5901, only the tunnel works. 0.0.0.0:5901 or [::]:5901 means a direct connection works once the firewall allows it, and no line at all means nothing is running on display :1.
Install Remmina with the VNC plugin

On Ubuntu 24.04 and Debian 13, install from the distribution and name the plugin:
sudo apt install remmina remmina-plugin-vnc
remmina --full-version
--full-version prints the Remmina version, then a table of every loaded plugin; you want a row that reads Remmina VNC Plugin. If a Remmina window is already open, you get the same list in a window instead.
Name the plugin even though the remmina package recommends it: an install with --no-install-recommends leaves VNC out.
The apt install remmina remmina-plugin-rdp remmina-plugin-secret line on the Remmina site is for the project's PPA. It only works after sudo apt-add-repository ppa:remmina-ppa-team/remmina-next, and it doesn't name the VNC plugin either. Reach for the PPA only when you need a newer release than your distribution ships.
Flatpak, Snap and Fedora: what changes
- Flatpak: add Flathub if the machine doesn't have it, then install and run the app. Profiles live under
~/.var/app/org.remmina.Remmina/data/remmina/instead of~/.local/share/remmina/.
flatpak remote-add --user --if-not-exists flathub https://flathub.org/repo/flathub.flatpakrepo
flatpak install --user flathub org.remmina.Remmina
flatpak run --user org.remmina.Remmina- Snap:
sudo snap install remmina. The snap can't read~/.ssh, so copy the keys the tunnel needs into~/snap/remmina/common/.ssh/. Saved passwords needsudo snap connect remmina:password-manager-service :password-manager-service. - Fedora:
sudo dnf install remmina remmina-plugins-vnc. Note the plural inremmina-plugins-vnc.
Save a VNC profile and connect
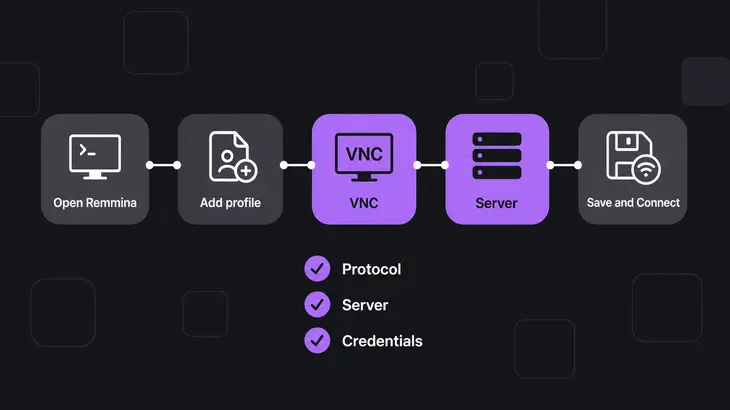
You save each connection as a profile, and only two fields have to be right: Protocol and Server. In the profile file they're protocol and server.
- Click + in the main window. The profile editor opens.
- Give it a Name you'll recognise, and pick Remmina VNC Plugin under Protocol.
- Put
<server-host>:1in Server. - Leave User password empty to get a prompt on every connect. If you save it,
remmina-plugin-secretkeeps it in your keyring and the profile only holds a.placeholder. - On a slow link, set Quality to Poor (fastest). The quality values run from Poor (0) through Medium and Good to Best (9).
- Make sure Close on connection failure is unticked for the first run. With it ticked, a failed VNC connection closes without an error and you're left guessing.
- Click Save and Connect. Unless you saved a password, the new tab asks for it with an "Enter VNC password" prompt.
For the direct route, the server's firewall has to let your client subnet in. On a server running ufw, open only the VNC port and only for your subnet:
sudo ufw allow proto tcp from <subnet> to any port 5901sudo ufw status should then list 5901/tcp as ALLOW with your subnet in the From column. If it prints Status: inactive instead, UFW is off, and Ubuntu ships it disabled: 5901 is already open to every host, and the rule only takes effect once you allow SSH and run sudo ufw enable.
For a one-off connection without a saved profile, hand -c a VNC URI:
remmina -c vnc://<server-host>:1Add the SSH tunnel to the profile
The tunnel is set on a tab of the same profile, so Server stays <server-host>:1, and the tunnel turns :1 into 5901 the same way before it forwards. Open the SSH Tunnel tab and set:
- Enable SSH tunnel.
- Tunnel via loopback address, when the server listens on 127.0.0.1 only. With it ticked, Remmina tunnels to the loopback address, 127.0.0.1:5901 on the SSH host. Without it, the SSH host connects onward to whatever name is in Server, and a localhost-only listener refuses that.
- Same server at port 22 for the common case, or Custom with
<bastion-host>:22when SSH lands on a different machine. - An authentication type and your SSH username. The choices are password, SSH identity file, SSH agent, public key and Kerberos. On the Snap build, pick the identity file from
~/snap/remmina/common/.ssh/, since the snap can't see~/.ssh.
Saved, the same tunnel looks like this in the profile file, where ssh_tunnel_auth=2 means SSH agent:
[remmina]
name=<server-host> display 1
protocol=VNC
server=<server-host>:1
ssh_tunnel_enabled=1
ssh_tunnel_loopback=1
ssh_tunnel_auth=2
ssh_tunnel_username=<user>
When you want SSH's own errors in front of you, forward the port with ssh -L yourself, turn the tunnel tab off, and point Remmina at your local end:
ssh -L 5901:localhost:5901 <user>@<server-host>
remmina -c vnc://localhost:1
That first line leaves you at a shell prompt on the server, and the forward lasts as long as that login does, so open another local terminal for the remmina -c line. Keep the built-in tunnel for profiles you reuse; the hand-built one is for debugging, or for when another tool needs the same forward.
Check the session and end it
Remmina opens a tab with the remote desktop. Click into it and type or move the mouse; if the desktop shows but ignores you, View only is on in the profile. To confirm from the server side, list the established connections on 5901:
ss -tn | grep 5901A direct session shows your client's address as the peer. A tunnelled one shows 127.0.0.1, because sshd makes the last hop locally.
To end the session, click Disconnect in the toolbar, which closes the tab. To quit Remmina completely, tray icon included:
remmina -qWhen the session won't open
If the tab disappears without an error, Close on connection failure is still ticked; untick it, reconnect, and work down this list in order:
| Symptom | Cause | Fix |
|---|---|---|
| Remmina VNC Plugin is missing from Protocol | The VNC plugin isn’t installed | sudo apt install remmina-plugin-vnc, then remmina -q and start Remmina again |
| “Unable to connect to VNC server” on a direct connection | The server listens on 127.0.0.1 only, or the firewall drops the port | Run ss -tln on the server. If 5901 shows as 127.0.0.1:5901, use the SSH tunnel; otherwise open the port with the ufw rule above |
| Connection refused with a bare host in Server | Remmina went to 5900, and the session is on display :1 |
Set Server to <server-host>:1 |
| SSH login works, then the VNC connection fails | Tunnel via loopback address is off, so the SSH host connects to <server-host>:5901 and the localhost-only listener refuses it |
Tick Tunnel via loopback address |
| Snap install can’t find your SSH key | The snap can’t read ~/.ssh |
cp ~/.ssh/<key> ~/snap/remmina/common/.ssh/ and select the copy in the profile |
| Flatpak install can’t use your SSH agent | The sandbox doesn’t see the agent socket | flatpak run --filesystem=$SSH_AUTH_SOCK --env=SSH_AUTH_SOCK=$SSH_AUTH_SOCK org.remmina.Remmina |
Anything else, open Debugging from the main menu, or quit Remmina and start it from a terminal with GLib debug output switched on, then reconnect and read the last lines:
remmina -q
G_MESSAGES_PREFIXED=all G_MESSAGES_DEBUG=all remmina
On the Flatpak, swap the final remmina for flatpak run org.remmina.Remmina.
Find, reuse and remove saved profiles
Remmina writes each connection to its own .remmina file with a generated name, in ~/.local/share/remmina/ for the distribution package. If an old ~/.remmina/ directory exists, Remmina goes back to using that one instead. Find a profile by its server:
grep -l '^server=<server-host>' ~/.local/share/remmina/*.remminaOpen it straight from a shell, or change a field without the editor with --set-option and --update-profile:
remmina -c ~/.local/share/remmina/<profile>.remmina
remmina --set-option server=<server-host>:2 --update-profile ~/.local/share/remmina/<profile>.remmina
To remove a profile, right-click it in the main window and choose Delete, or delete its file. Either way only the local entry goes; nothing changes on the server.
If you opened 5901 in ufw while you tried the direct route and the tunnel profile now connects, take that rule back out with sudo ufw delete allow proto tcp from <subnet> to any port 5901. The tunnel only needs SSH, so the VNC port can stay closed to everything but localhost.
FAQs
Why doesn't the right Ctrl key reach the remote desktop?
Remmina keeps Right Ctrl for itself as its host key, so the VNC server never sees it. Use the left Ctrl in the remote session, or pick another host key in the Keyboard section of Remmina's preferences. Tapped on its own, Right Ctrl grabs or releases the keyboard; held with F or S, it toggles fullscreen or scaling.
Does Remmina offer a profile setting that prevents password storage?
Yes. Tick Forget passwords after use in the VNC profile. In the profile file that's disablepasswordstoring=1, and Remmina asks for the password on every connection.